Showing posts with label tutorial. Show all posts

Tuesday, December 21, 2010

Craft Funny & 2x4 Stocking Tutorial

Busy, busy, busy!  The other day my daughter wanted to "help" me with one of my projects.  I love when my kids help me.  We were in the garage spray painting some wood.   I gave her a job of spray painting some tiny clothespins.  I ran inside to grab something, came back and squatted down to finish spray painting.  What I didn't know is my daughter had set her can of dark brown spray paint right under me (on accident).  I sat on the thing just enough for it to spray paint all over my rear.  Only me!

I'm sure after that story you are inspired to go spray paint something.  Let's make some 2x4 stocking hanger/holders!


  Grab a 2x4.  I cut mine in 7 inch pieces.  Sand those pieces.


Grab a hook of some sort.  Mine is from Home Depot.  It cost me a whole .38 cents.   There are nicer screw in hooks (and more expensive) but this cheap one gets the job done.  The only thing I suggest is not getting one this long.  A shorter one will do the job.  I drilled the hole for the screw.


Use some pliers to twist the screw in.  I couldn't find my pliers so I used this thingamajig.


At this point your project should look something like this....
=-

Add on one of these small craft finials from Lowes.  They just screw in the top of your 2x4.


I took my project into the garage and spray painted it.  While I was waiting I ironed freezer paper onto burlap and printed the kids names out with my printer.  I'm in love with this font.  It's called I'm Bored :)


Cut the burlap to fit on the face of your 2x4 piece and then use Cut Tacks Tachuelas.  I think it's hilarious they are called Tachuelas because when you reach your little fingers in the package it's like a bunch of little Dracula's biting you.  OK not so funny but I thought the name is appropriate.  Tachuelas are great.  You can push them in the wood a little and just use a hammer to complete the job.


Last but not least use Gorilla Glue to secure the two pieces together. 


You're done and your kids will be super happy!


Sunday, December 12, 2010

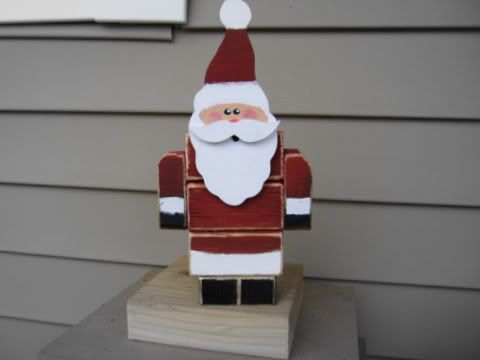
2x4 Santa tutorial & pattern

Just in case you didn't see this Santa tutorial over at Someday Crafts.  Here is my tutorial and patterns :)

Ok!  Enough of that "me" stuff and onto the goods!  A 2x4 Santa!
Photobucket

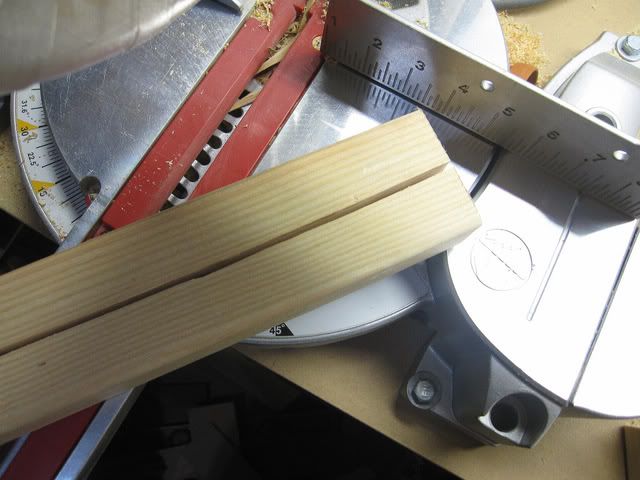
You will need a 2x4 or a 1x3. Either will do.  I have done this two different ways.  If you want your Santa to look like the Hunchback of Notre Dame from the side then skip this next step :)  Cut your 2x4 in half lengthwise.  Like this....

Photobucket

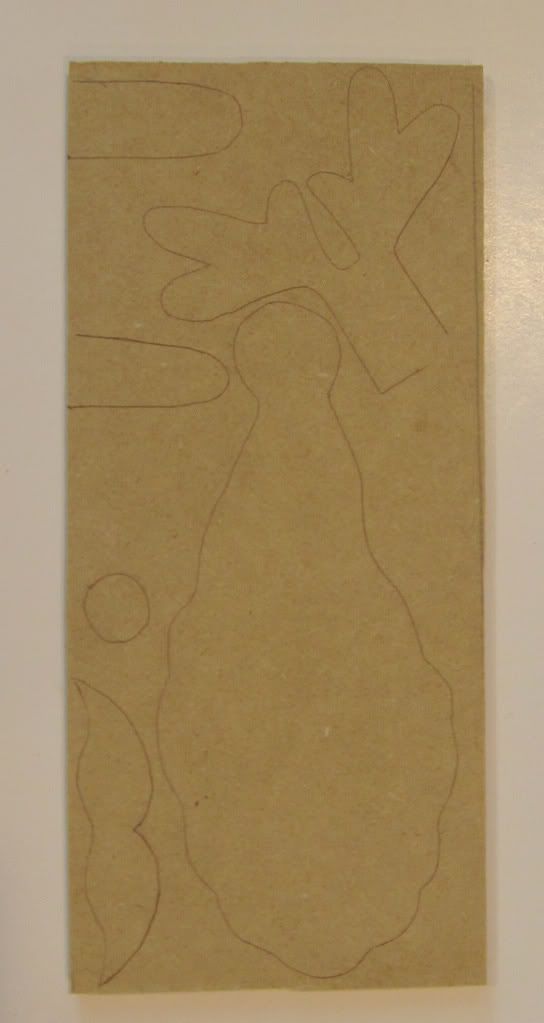
Then cut 3 pieces at 3 inches (the body), 2 pieces at 3/4 inch (arms) and 1 piece at 2 1/2 inches (shoes).  Next grab your scroll saw OR trace the following pattern on chipboard, cardboard or cereal box.


Photobucket

My material of choice is 1/4 inch MDF so I used my scroll saw.  My reindeer pattern is also traced on this piece of wood.  Hop over to my blog for the tutorial.

Photobucket


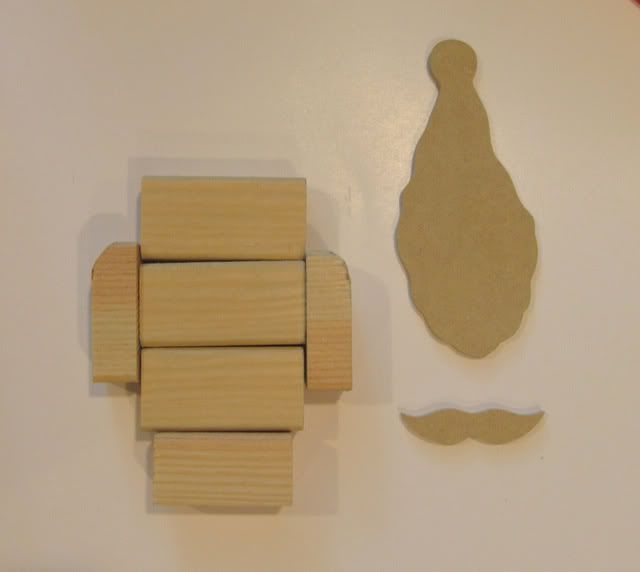
At this point you should have something like this....

Photobucket
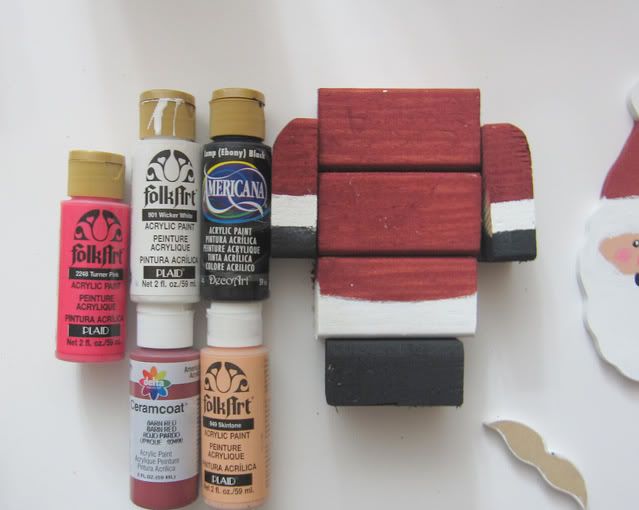
Paint your pieces. Let them dry.

Photobucket

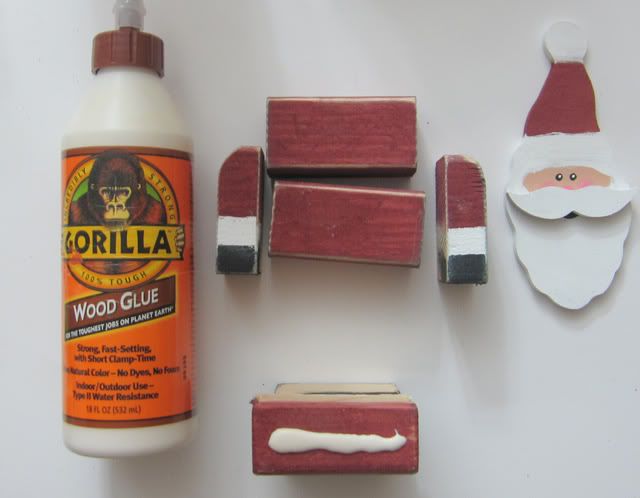
Sand the edges.  Sand down the middle of the shoes to give the appearance of two shoes instead of one big shoe.  A dremel works great for this step.  Glue the pieces together. I like to use gorilla glue. Strong as a gorilla :)

Photobucket

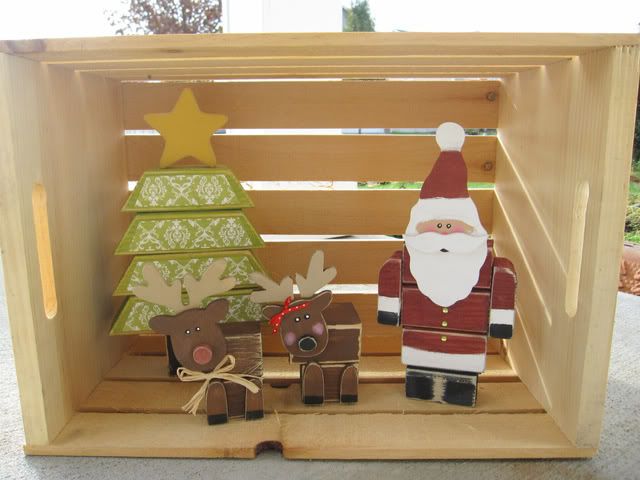
Make sure you remember to glue the mustache on Santa and .....you are done!

Photobucket

Thanks for crafting with me and have a wonderful holiday!

Sunday, December 5, 2010

The Wonderful World of Crates


A wall in my house is dedicated to crates right now.  Not because I necessary want a wall of crates but I am storing them for an event.  As they have sat there the past moth I have found...Crates are so useful!  So many fun things to do with them.  They are great for Christmas decorations.  As you can tell by the picture below I use them to store stuff and my kids use them for their Lego's.


 Building a crate is easy.  Here we go with Crate 101....

Grab a piece of wood.  If you are like me you have a ton in the garage.  If not go down to Home Depot and grab what you like.  The piece of wood in the picture below cost about $1.60ish.

Decide what size you want your crate.  I'm going to build a 12x12" one.  Cut (6) 12 inch pieces.  Then cut 2 of those pieces in half lengthwise as shown in the picture below.

You should now have (4) 12 inch pieces and (4) 6 inch pieces.  Grab you handy dandy air powered staple gun.   If you don't have one you can use nails and a hammer.  I have to admit...this little tool is a lot of fun ;)


Staple the corners together to form a box.

This above picture was so hard to take with my left hand!  Here is a pic of the started box...

 Place your 6 inch pieces on the box you just built (the (2) 12 inch pieces we cut in half lengthwise).


Finally staple or nail those babies on.


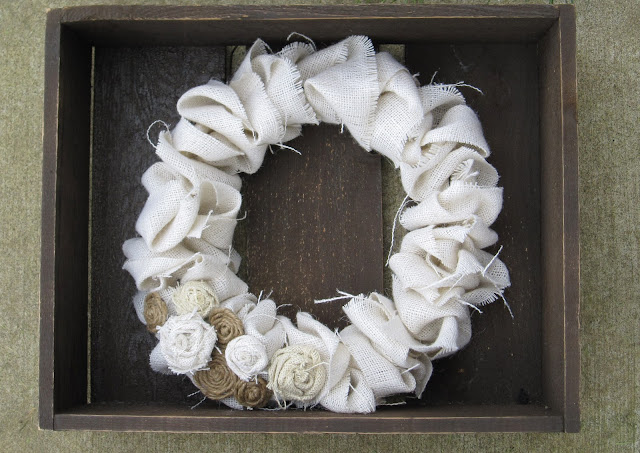
Lately I have been using my crates for photo props but you can also use them for decoration.  Grab that crate you just made and paint it dark brown, sand it, make yourself a cute burlap wreath and this is what you get....


I'm not sure exactly how much this cost me to make total because I had all the supplies on hand but if I were to guess I would say about $3.00.  Can't beat that!


Monday, November 29, 2010

Cone Tree Tutorials

This year there are a ton of cute cone tree tutorials out there!  I've got to get on it and make some.  I've included a few of my favs and all of them have tutorials.  Bonus!


Picnik collage_thumb.jpg


Trees


A Feathered Nest


Craft Stylish


Urban Daisies

Friday, November 26, 2010

Reindeer tutorial & Pattern

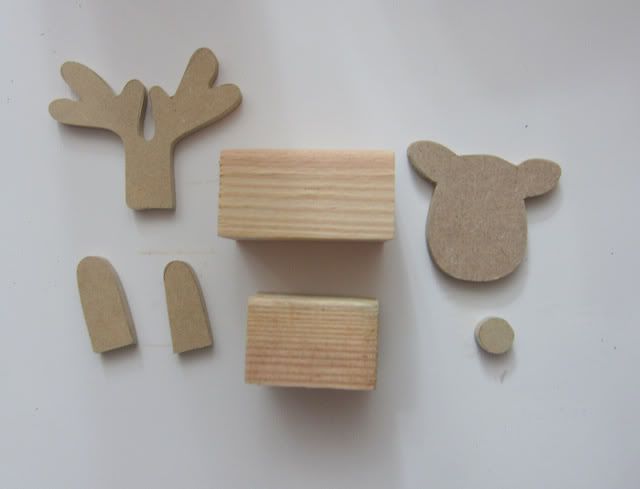
I was working on my Santa tutorial (it will be shared on Someday Crafts on Nov 30th) and somehow I ended up with some reindeer!
Photobucket


Here's a quick "how to".  Take your 2x4 or 1x3 and make a cut down the middle...like this....
Photobucket

Then make a 3 inch piece and a 2 1/2 inch piece.  You end up with doubles...so why not make 2?!!  Grab your scroll saw and cut out these pieces.
Photobucket


Don't have a scroll saw??? Try using chipboard or cardboard.  You could even use a cereal box :)  Trace the pictures on material of choice (mine is 1/4 inch MDF) and cut them out with scissors/saw.

Photobucket
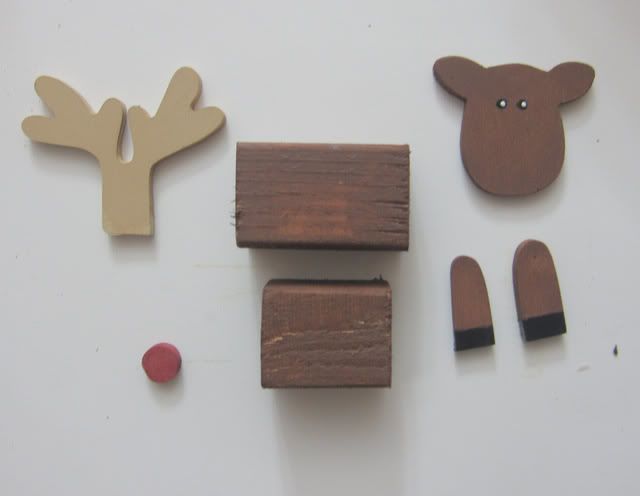
Paint the wood pieces and then if you want give them a sand around the edges. 

Photobucket

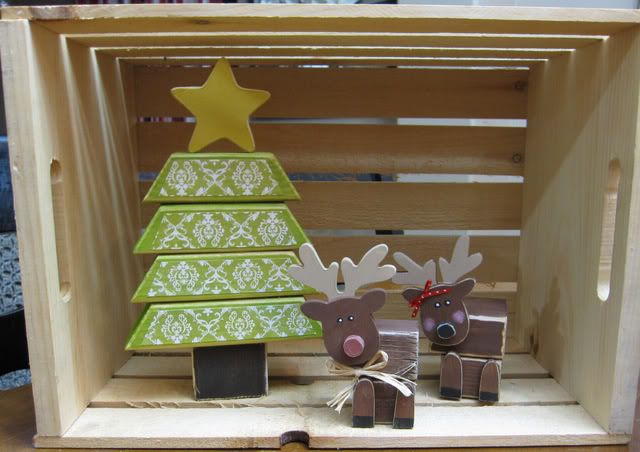
Grab your gorilla glue to glue the pieces together and your finished!
Photobucket
I have a ton of crates hanging around my house right now.  I've even built a few.  More on that soon...
Related Posts Plugin for WordPress, Blogger...