


Ok! Enough of that "me" stuff and onto the goods! A 2x4 Santa!

You will need a 2x4 or a 1x3. Either will do. I have done this two different ways. If you want your Santa to look like the Hunchback of Notre Dame from the side then skip this next step :) Cut your 2x4 in half lengthwise. Like this....

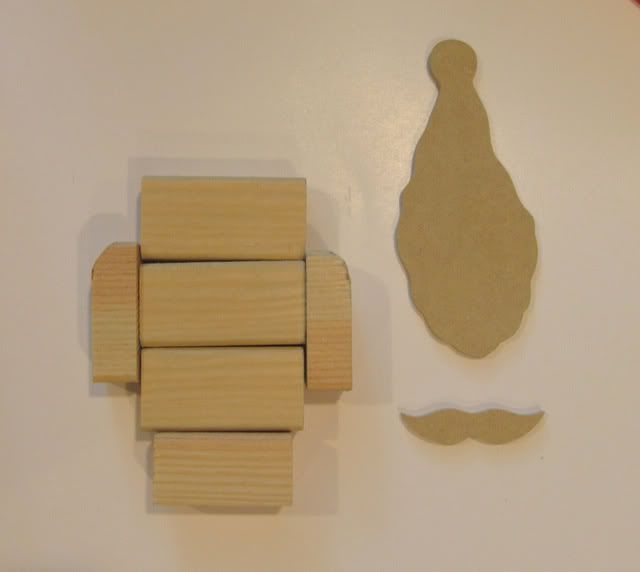
Then cut 3 pieces at 3 inches (the body), 2 pieces at 3/4 inch (arms) and 1 piece at 2 1/2 inches (shoes). Next grab your scroll saw OR trace the following pattern on chipboard, cardboard or cereal box.

My material of choice is 1/4 inch MDF so I used my scroll saw. My reindeer pattern is also traced on this piece of wood. Hop over to my blog for the tutorial.

At this point you should have something like this....
Paint your pieces. Let them dry.

Sand the edges. Sand down the middle of the shoes to give the appearance of two shoes instead of one big shoe. A dremel works great for this step. Glue the pieces together. I like to use gorilla glue. Strong as a gorilla :)

Make sure you remember to glue the mustache on Santa and .....you are done!

Thanks for crafting with me and have a wonderful holiday!


È muitolindo! adorei.Parabéns.
ReplyDeleteI'm trying to make these as gifts for my family and am having a blast. One thing...the pattern for the santa fact/mustache and the tree star have no demintions. I'm winging it and will see how closely I come. Thanks for all your fun crafts!
ReplyDeleteLove all of your patterns! Thank you for sharing. I wish you were on Pinterest, so I could follow you on there. I wondered if you had a pattern for a manger?
ReplyDelete