Showing posts with label Christmas. Show all posts

Tuesday, December 21, 2010

Craft Funny & 2x4 Stocking Tutorial

Busy, busy, busy!  The other day my daughter wanted to "help" me with one of my projects.  I love when my kids help me.  We were in the garage spray painting some wood.   I gave her a job of spray painting some tiny clothespins.  I ran inside to grab something, came back and squatted down to finish spray painting.  What I didn't know is my daughter had set her can of dark brown spray paint right under me (on accident).  I sat on the thing just enough for it to spray paint all over my rear.  Only me!

I'm sure after that story you are inspired to go spray paint something.  Let's make some 2x4 stocking hanger/holders!


  Grab a 2x4.  I cut mine in 7 inch pieces.  Sand those pieces.


Grab a hook of some sort.  Mine is from Home Depot.  It cost me a whole .38 cents.   There are nicer screw in hooks (and more expensive) but this cheap one gets the job done.  The only thing I suggest is not getting one this long.  A shorter one will do the job.  I drilled the hole for the screw.


Use some pliers to twist the screw in.  I couldn't find my pliers so I used this thingamajig.


At this point your project should look something like this....
=-

Add on one of these small craft finials from Lowes.  They just screw in the top of your 2x4.


I took my project into the garage and spray painted it.  While I was waiting I ironed freezer paper onto burlap and printed the kids names out with my printer.  I'm in love with this font.  It's called I'm Bored :)


Cut the burlap to fit on the face of your 2x4 piece and then use Cut Tacks Tachuelas.  I think it's hilarious they are called Tachuelas because when you reach your little fingers in the package it's like a bunch of little Dracula's biting you.  OK not so funny but I thought the name is appropriate.  Tachuelas are great.  You can push them in the wood a little and just use a hammer to complete the job.


Last but not least use Gorilla Glue to secure the two pieces together. 


You're done and your kids will be super happy!


Sunday, December 19, 2010

2x4 Christmas Stocking Holder...

We now have a place to hang stocking in this house!


Tutorial later and a fun giveaway tomorrow.

Friday, December 17, 2010

Burlap Ornament

I think it's going to be a burlap Christmas here in my house.  I just can't help myself.  I love the simplicity of it.  This burlap ornament is super quick and easy but also looks BEAUTIFUL on my tree!


For my wood cutting friends...did you know Home Depot has started selling sheets of 1/8 inch MDF?  A sheet cost $2.99.   That means I can cut out with my scroll saw... oh I don't know maybe hundred plus of these 1/8 wooden ornaments (below) for about a cent.  If your not a person who cuts wood you can go down to a craft store and get 10 or so for $5.00.


To make this ornament you need some sort of base.  I cut an ornament because I was doing something else with them too.  A circle will do.  Grab a pencil and your hot glue gun.   Cut a bunch of squares of burlap.  I frayed the ends of mine because I like that look.  Most burlap naturally does it :)


Wrap the burlap around your pencil and put a dot of hot glue on it.


Start in the center and press down on the wood.


Don't forget your ornament hanger!  I used Jute and hot glued it to the wood.  This can be done at the beginning.  I almost forgot.


I put them close together in the center.   As you get closer to the edges just let the burlap fall that way.


It's just that easy.  Have a very merry burlap Christmas!


Tuesday, December 14, 2010

The Ruffler & Christmas Trees

The other day I was admiring Shanty2Chic's ruffle trees...

Aren't they amazing?!  I knew right away I wanted to make myself some especially since my craft group was focusing on making trees out of cones.  I went and bought all my stuff and then went back to Shanty2Chic's blog for the tutorial.  Right away I realized I didn't have a ruffler foot for my sewing machine.  I called a few friends and NO one had a ruffler foot.  So I pouted about it for a while.  Then I got grouchy about it.  Stupid ruffler.  Finally I decided to take action.  I decided I was going to buy that darn ruffler and show it who is boss.  I came to find out the craft stores in my area don't carry the ruffler and I would have to order it online.  I didn't want to wait days for it to come!  So what did I do?  Well I pouted and cried a little more and got a whole lot more grouchy :)  I know I could still sew ruffles but I just wanted to use that ruffler.  I moved onto a new project still thinking "stupid, stupid, stupid" (stupid is a bad word in our house)  "ruffler!".  I pulled out my glue gun to work on another project and realized I too could make beautiful ruffles with my handy dandy glue gun and no sewing would be involved.  Problem solved! 

My no sew, no ruffler beautiful Christmas tree.... 

Ruffles were achieved by gluing a little ribbon on and back tracking every once in a while to form a ruffle!  Now I just need to make a few more.


Thank you glue gun!  Oh and Ruffler...I don't hold this against you in any way.  I will probably buy you someday :)

Sunday, December 12, 2010

2x4 Santa tutorial & pattern

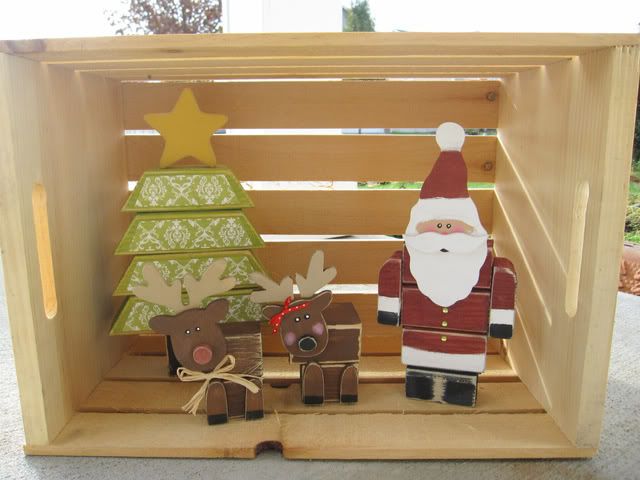
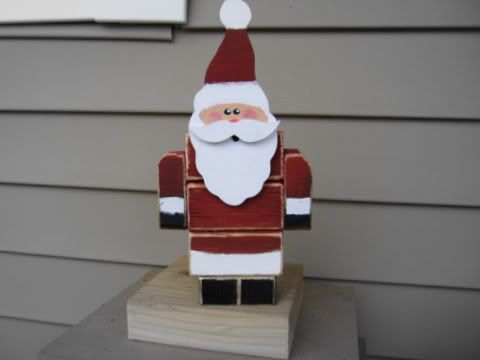
Just in case you didn't see this Santa tutorial over at Someday Crafts.  Here is my tutorial and patterns :)

Ok!  Enough of that "me" stuff and onto the goods!  A 2x4 Santa!
Photobucket

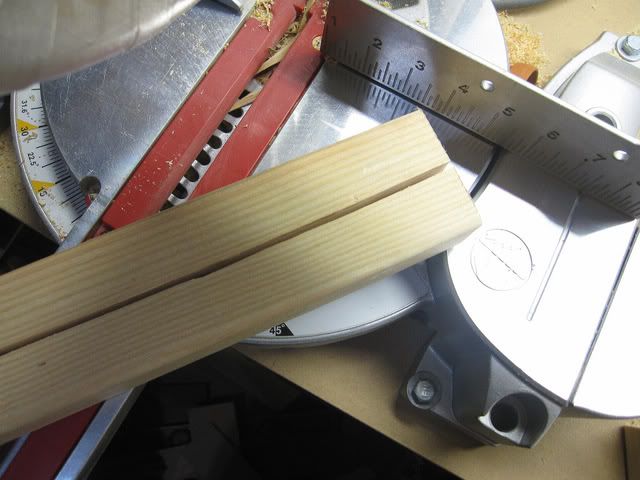
You will need a 2x4 or a 1x3. Either will do.  I have done this two different ways.  If you want your Santa to look like the Hunchback of Notre Dame from the side then skip this next step :)  Cut your 2x4 in half lengthwise.  Like this....

Photobucket

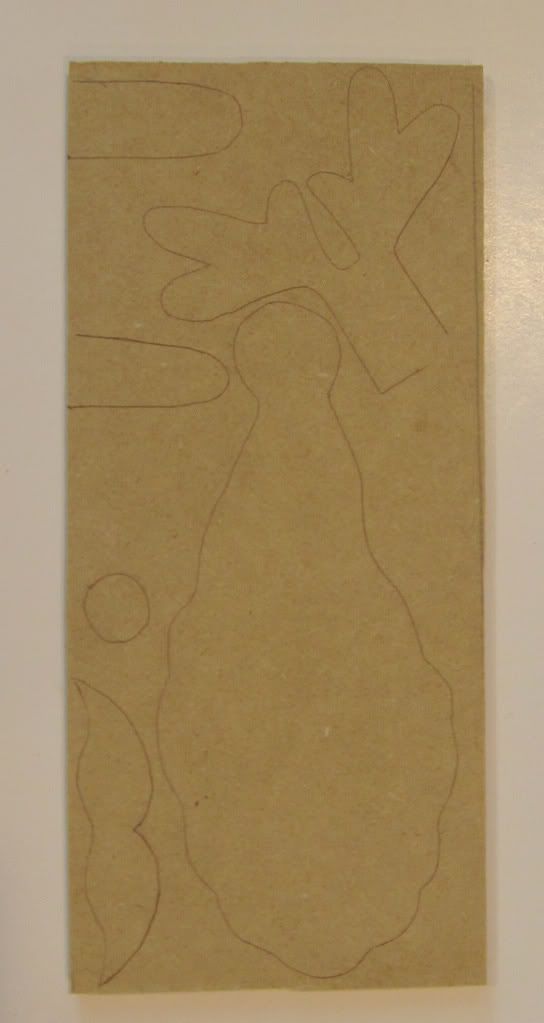
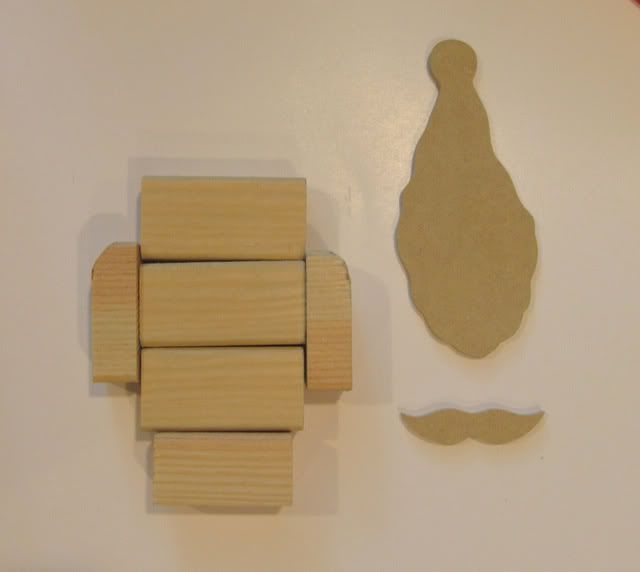
Then cut 3 pieces at 3 inches (the body), 2 pieces at 3/4 inch (arms) and 1 piece at 2 1/2 inches (shoes).  Next grab your scroll saw OR trace the following pattern on chipboard, cardboard or cereal box.


Photobucket

My material of choice is 1/4 inch MDF so I used my scroll saw.  My reindeer pattern is also traced on this piece of wood.  Hop over to my blog for the tutorial.

Photobucket


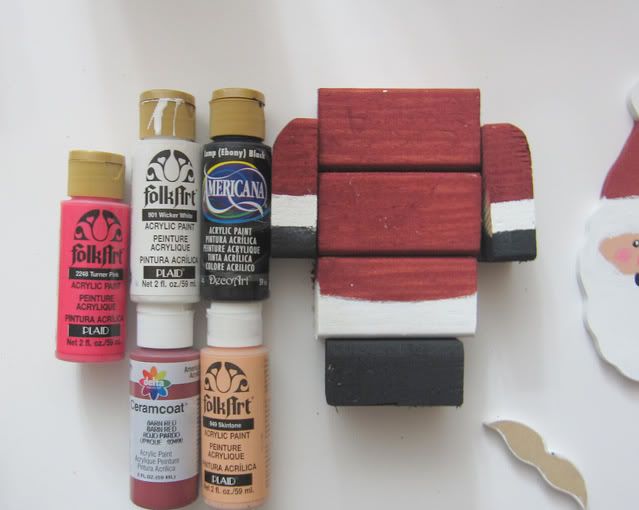
At this point you should have something like this....

Photobucket
Paint your pieces. Let them dry.

Photobucket

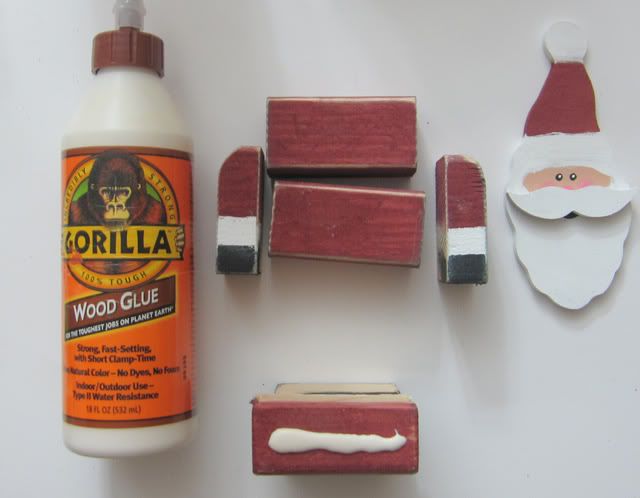
Sand the edges.  Sand down the middle of the shoes to give the appearance of two shoes instead of one big shoe.  A dremel works great for this step.  Glue the pieces together. I like to use gorilla glue. Strong as a gorilla :)

Photobucket

Make sure you remember to glue the mustache on Santa and .....you are done!

Photobucket

Thanks for crafting with me and have a wonderful holiday!

Thursday, December 2, 2010

JOY

I know this idea is everywhere but I wanted to try it.  All you need is some paper, mod podge and some charger plates.  I love these brown plates.  The pictures don't do them justice.


I cut the scrapbook paper out on my cricut.  Love the cricut... it makes my life so much easier!


Mod podge the paper on.  Really easy and fast.


I hope you find a little joy in your life this holiday season :)


Wednesday, December 1, 2010

Teacher Gift - Take 1

Sometimes to make something super cute you have to make a bunch of junk first.  Well at least I do...I'm sure some of you just whip out cuteness on the first try....not me.  This is my first attempt at this sign.  I don't love it and know the changes I need to make :)

Today my friend commented on all the crates in my pictures.  Yep there have been a whole lot of them hanging around my house.  I'm even going to teach you to make some later in the week.   I'm sure most of you already know how or are wondering why you would want to know how.  Some super cute things can happen with wood crates!
Wish me luck on my second attempt!

UPDATE:  Here is my second attempt.  This one is for the Festival of Nativities.  I'm still working on it but I LOVE the jute twine rosette!!


Monday, November 29, 2010

Burlap Sign

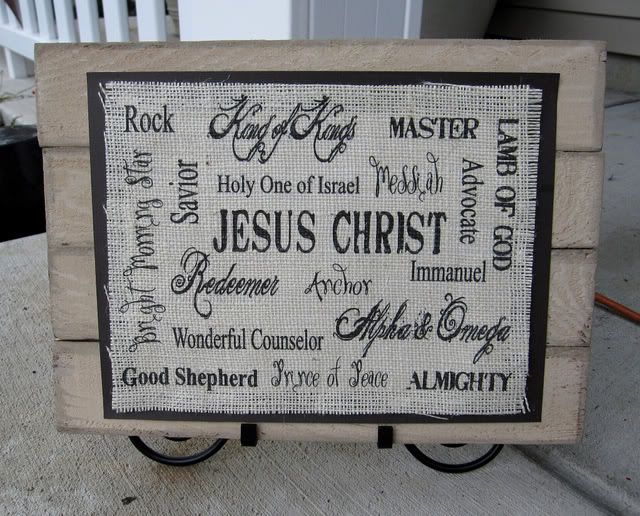
Today my plan was to accomplish many things around my house that need attention.  Half way through I sat down to check my email, got distracted and started creating.  I'm glad I did because this project makes me happy!  This is what I'm going to give all my kids primary teachers for Christmas....
Photobucket
**I used THIS tutorial to print on the burlap***

I'm going to put some cute rosettes on it too but this particular one will be used for the Festival ofNativities. Thanks to Melanie over at Sugardoodle for helping me make my document into a pdf file.  Learn something new everyday!  
Cone Tree Tutorials

This year there are a ton of cute cone tree tutorials out there!  I've got to get on it and make some.  I've included a few of my favs and all of them have tutorials.  Bonus!


Picnik collage_thumb.jpg


Trees


A Feathered Nest


Craft Stylish


Urban Daisies
Related Posts Plugin for WordPress, Blogger...